SmartBuilder > Help Documentation > Objects > Character

Add and edit characters

  1. Select the character object and add it to the stage.
    character object
  2. Click the pencil icon on the outer left corner of the character object, or double-click the character object.
    character object edit pencil
  3. Select the character you want to use.

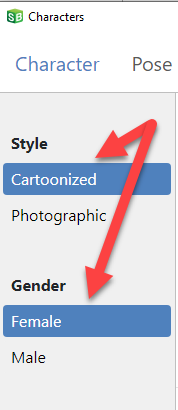
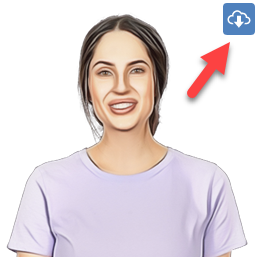
    Note You can refine your character search by toggling the options of Cartoonized / Photographic and Female / Male. To download a complete character set, click on the download from the cloud button at the top right corner of the character.

    character-search modify character download
  4. Click on the Pose tab or the View Poses button on the right and select the pose you want.
  5. Select the cropping you want to use: Headshot, Half or Full.
  6. Click the Insert button.
  7. The character in the pose and cropping you have selected are now added to the page.
  8. Scale and move your character to make it work with your page's design.
  9. To add other poses or characters to the same instance of the character object click the pencil icon on the outer left corner of the character object, or double-click the character object to go into 'editing mode.'
    character object edit mode
  10. Here you can add a new state or character by clicking on the 'plus' in the filmstrip above the selected character. You can also modify any selected state by adjusting its cropping. Flip it horizontally or sync its current cropping and size to the other poses you have selected. You can also change the order of your states by dragging and dropping them in the filmstrip.