Working with masters
From the master view
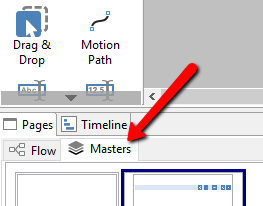
- In the Pages tab, click Masters.

- Click the master you want to edit.
- Make the desired changes.
From the current page
- On any page that contains the master you want to edit, in the Cast, click the master stack
 .
.
- Click the layer you want to edit.
- Select the object you want to edit.
Note You will see that the selection marks are red instead of black. This is to remind you that even though you are editing the master from a specific page, the change affects that master on all pages. Objects in the master are also locked, and you must unlock them in order to change them.

- Click the lock to unlock the object. Then, make your desired edits.
- Click the lock again
 to lock the object. (If you forget, all objects on the master will be re-locked when you change pages.)
Apply a master to all pages
- In the Pages tab, click Masters.

- Right-click the master you want to apply, and then click Apply to All Pages. Click either on Top or on Bottom, depending on whether you want the master on top of other layers on the page, or underneath them.
Remove a master from all pages
- In the Pages tab, click Masters.

- Right-click the master you want to remove, and then click Remove from All Pages.
Apply a master to one page
- On the page where you want to apply the master, in the Cast, click Select Master
 .
.
- Double-click the master you want to apply. (If the master is not available, check to see if it is already on the page.)
Remove a master from one page
-
On the page where you want to remove the master, in the Cast, right-click the master you want to remove
 , and then click Delete.
Delete a master
- In the Pages tab, click Masters.

- Right-click the master you want to delete, and then click Delete.
Tip If the master is currently being used on any pages, you will see a warning confirming that you want to delete the master.
Create a new master from scratch
- In the Pages tab, click Masters.

- Click New Master

or
Right-click any existing master, and then click New Master.
Add navigation to a master
To select the master you want to add navigation to:
- In the Pages tab, click Masters.

- Click the master you want to work with, or create a new master.
To create a Next Page button:
- Add a button with the desired shape, text, and/or icon. See Add icons to a button.
- Select the button.
- On the Actions tab, click the when block.

- On the Actions tab, hover over the Page menu, and then click the goto next page block.

- Drag the goto next page block into the when block.

To create a Previous Page button:
- Follow the steps above, using the goto previous page block instead of the goto next page block.

Tip If you are going to create both a Next Page and a Previous Page button, you can duplicate the first button and change the text/icon as required. Then, you can duplicate the Next Page action and use the dropdown menus to change the button name and the page control.


Add a page menu to a master
To create the page menu:
- Create a new layer for the menu.
- In the Palette, click Menu
 .
.
- Click on the page where you want the menu to be, and then drag to the desired size. The menu object will populate with the existing pages in your lesson.

- Customize the menu as desired (see The Menu Object). You can also add a shape, such as a rectangle, for a background.
To have the menu appear upon click of a button, instead of always being visible, see Create “pop-ups” using layers.


 .
.
 to lock the object. (If you forget, all objects on the master will be re-locked when you change pages.)


 .
. , and then click Delete.


 .
.